लंबी उड़ान के बाद थकान महसूस हो सकती है, लेकिन यही से आपकी जापान यात्रा शुरू होती है। आगे आप बहुत‑सी जगहें देखेंगे, अलग‑अलग चीज़ें चखेंगे और मज़ा लेंगे—यही हमारी उम्मीद है।
एयरपोर्ट पर पहली बार होने के कारण थोड़ा घबराना स्वाभाविक है, पर चिंता न करें। वहाँ के संकेत बोर्ड अंग्रेज़ी में भी होते हैं और कर्मचारी आम तौर पर बहुत मददगार होते हैं। इसके अलावा, हम आपको लेने भी आएँगे। अब चलिए, एयरपोर्ट से होटल तक पहुँचने की पूरी प्रक्रिया को एक‑एक करके देख लें।
English
You’ve made it—welcome to Japan! The trip really starts now. I hope you’ll explore plenty, see a lot, eat well, and enjoy yourself.
It’s normal to feel a bit tense when you step into a new airport, but don’t worry. Signs are in English and the staff are generally very helpful. We’ll be there to meet you, too. Let’s quickly run through what happens from landing at the airport to arriving at your accommodation.
प्रवेश‑प्रक्रिया / Airport Entry Procedures
विमान उतरते ही भीड़ के साथ आगे बढ़ें—उसी दिशा में सभी प्रक्रियाएँ होती हैं। क्रम सामान्यतः इस प्रकार है।
① स्वास्थ्य जाँच / Qarantine
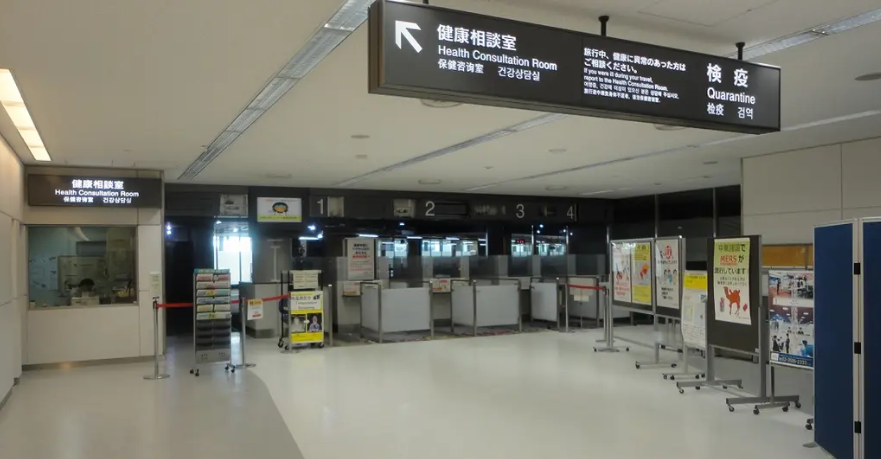
सबसे पहले स्वास्थ्य से जुड़ी एक छोटी प्रश्नावली जमा करनी होती है। यह फ़ॉर्म आम तौर पर विमान में दिया जाता है; अगर न मिला हो तो क्वारंटीन डेस्क पर मिल जाएगा। इसमें आपकी तबीयत और पिछले 14 दिनों में किन‑किन देशों में गए हैं, जैसी जानकारी भरनी होती है। अंग्रेज़ी में लिखना स्वीकार्य है। कोई問題 न हो तो फ़ॉर्म जमा करते ही यह चरण समाप्त हो जाता है।
English
Once the plane lands, simply follow the crowd—everything is laid out in order.
Your first stop is a brief health check where you hand in a questionnaire about infectious diseases. Cabin crew usually distribute the form on board; if you miss it, pick one up at the quarantine desk. It asks about your current health and where you’ve been in the past 14 days. English is perfectly acceptable. If nothing flags, you just hand it over and move on.
② इमिग्रेशन / Immigration
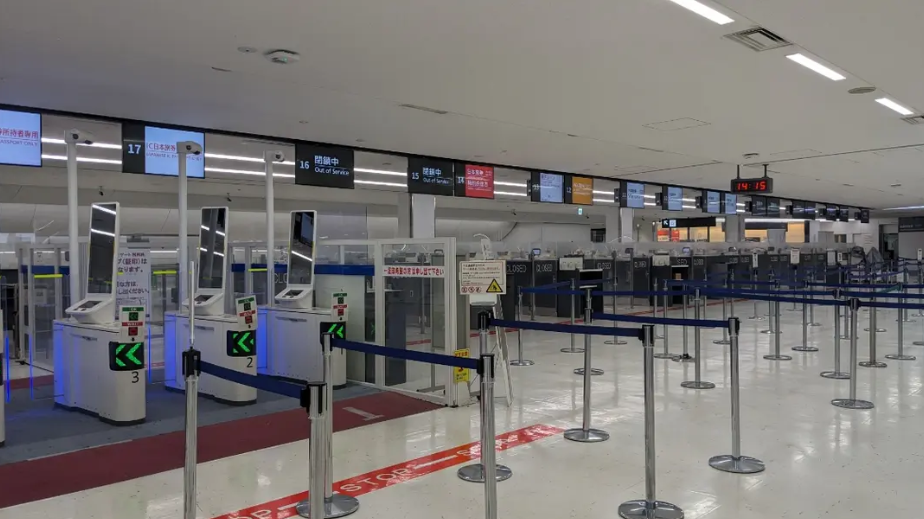
क्वारंटीन के बाद अगला चरण इमिग्रेशन है। यहाँ आप अपना पासपोर्ट और इमिग्रेशन कार्ड दिखाते हैं। कार्ड विमान या काउंटर से मिलता है। इसके बाद उँगलियों के निशान और चेहरे की तस्वीर ली जाती है। अधिकारी अंग्रेज़ी में दो‑तीन साधारण सवाल पूछ सकते हैं—चिंता न करें, बस रहने की अवधि और यात्रा का उद्देश्य बता दीजिए।
संभावित सवाल‑जवाब
- प्र: जापान आने का उद्देश्य?
उ: पर्यटन। - प्र: आप कहाँ ठहरेंगे?
उ: टोक्यो में अपने बेटे के घर पर। - प्र: कितने दिनों के लिए रहेंगे?
उ: 10 दिन।
अगर चाहें, तो “Visit Japan Web” पर उड़ान से पहले ऑनलाइन फ़ॉर्म भर दें—इमिग्रेशन का चरण और तेज़ हो जाएगा।
English
After quarantine comes immigration. Hand your passport and the arrival card to the officer. The card is usually given out on the plane; if you miss it, you can pick one up just before the immigration desks. Next, they’ll take your fingerprints and a quick photo. An officer may ask a few simple questions in English—nothing to worry about. Just state your purpose and how long you’ll stay.
Typical Q&A
- Q: What’s the purpose of your visit to Japan?
A: Tourism. - Q: Where will you be staying?
A: At my son’s home in Tokyo. - Q: How long will you stay?
A: Ten days.
You can also skip the paper card by filling out the form in advance on Visit Japan Web; doing it before your flight makes immigration faster.
③ सामान प्राप्त करना / Baggage Claim
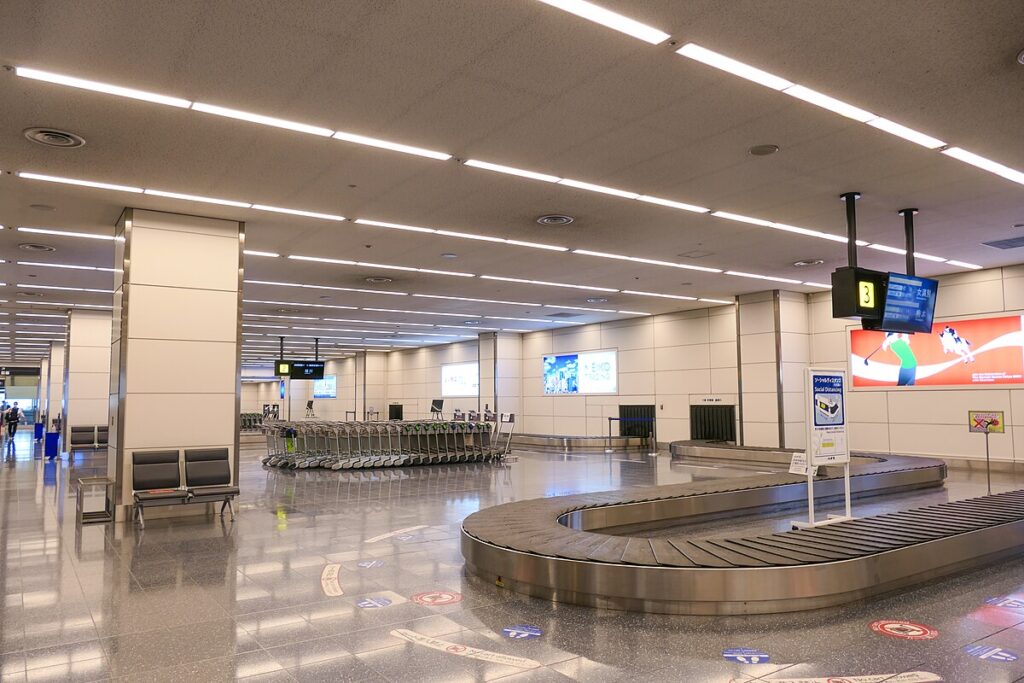
इमिग्रेशन के बाद अगला कदम सामान लेना है। आगमन बोर्ड पर अपनी उड़ान संख्या देखें और उसी नंबर वाले कन्वेयर बेल्ट (सामान वाली पट्टी) के पास जाएँ—कई बेल्ट होते हैं, इसलिए नंबर मिलान ज़रूर करें।
सामान आने में समय लग सकता है, इसलिए धैर्य रखें। अगर काफी देर तक आपका बैग न दिखे, तो स्टाफ से कहें: “My baggage is missing.” वे तुरंत मदद करेंगे। बैग जमा करते समय कितने पीस दिए थे यह याद रखें, और अपने सूटकेस पर कोई चमकीला टैग या रिबन लगा दें—पहचानने में आसानी होगी।
कन्वेयर बेल्ट के पास ही एक पौधा‑क्वारंटीन डेस्क होता है; यदि आपके पास फल या मांस उत्पाद नहीं हैं, तो वहाँ रुकने की ज़रूरत नहीं।
English
After immigration, head to baggage claim. Check the monitors for your flight number and go to that carousel—there are several, so be sure it’s the right one.
Bags can take a while to appear, so just wait calmly. If yours doesn’t show up, ask a staff member: “My baggage is missing.” They’ll help you right away. Try to remember how many pieces you checked in, and add a bright tag or ribbon to your suitcase so you can spot it easily.
You’ll also see a plant‑quarantine desk nearby; if you’re not carrying fruit or meat products, you can walk past it.
④ सीमा शुल्क / Customs
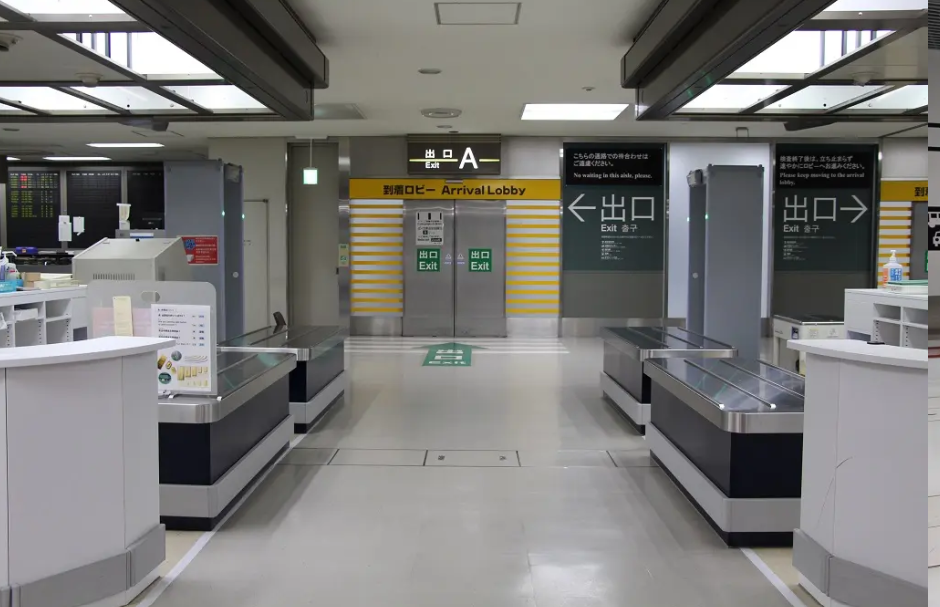
कस्टम्स पर बस घोषणा‑फ़ॉर्म जमा करें। एक लाख येन से ज़्यादा नकद या बिक्री‑के‑लिए सामान होने पर ही शुल्क लगता है; आमतौर पर कोई भुगतान नहीं होता। अधिकारी कभी‑कभी बैग खोलकर जाँच करते हैं—यह सामान्य प्रक्रिया है, रिश्वत जैसी बात नहीं होती।
English
At customs, hand in your declaration form. Duty is charged only if you carry more than ¥1,000,000 in cash or goods for resale, so most travellers pay nothing. Random bag checks are routine—there are no bribes or extra “fees” at all.
टोक्यो शहर के केंद्र तक पहुँचना / Getting to Central Tokyo
बस हो गया—जापान में आपका स्वागत है! हम आगमन द्वार पर इंतज़ार कर रहे होंगे, इसलिए टोक्यो तक का सफ़र हम पर छोड़ दीजिए। फिर भी, संदर्भ के लिए, यदि आवश्यक हो तो आप हवाई अड्डे से शहर तक कैसे पहुंच सकते हैं, यह यहां बताया गया है।
English
You’re through—welcome to Japan! We’ll be waiting at the arrivals exit, so leave the ride into Tokyo to us. Still, for reference, here’s how you can get from the airport to downtown if needed.
हानेदा हवाई अड्डा (Haneda Airport) से
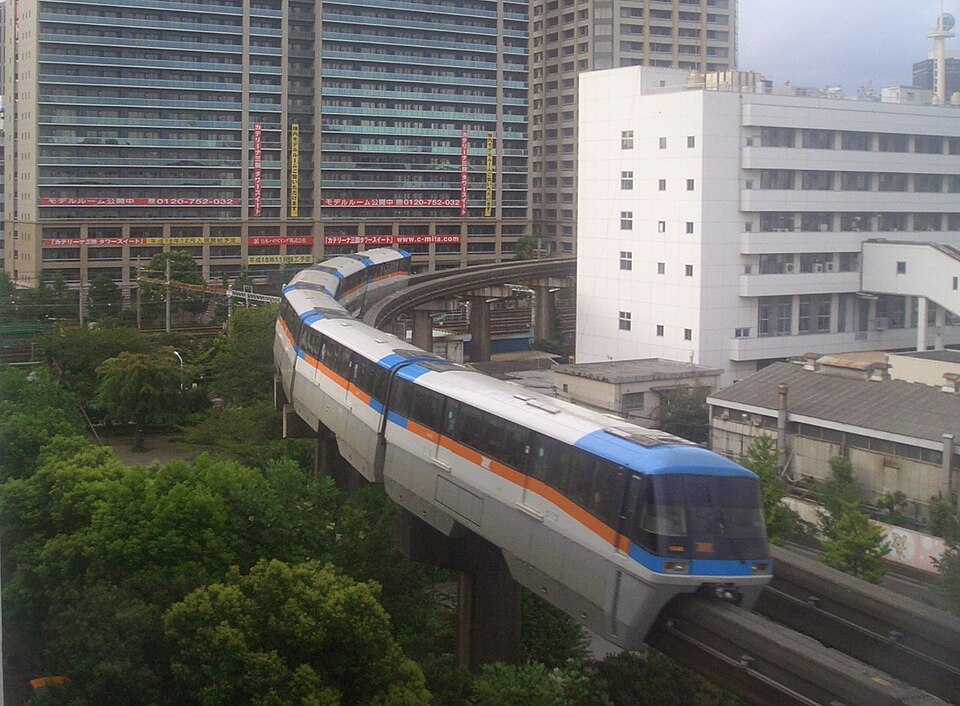
मोनोरेल सबसे आसान विकल्प है। टोक्यो बे का नज़ारा लेते हुए 15 मिनट में आप हामामात्सुचो स्टेशन पहुँचेंगे; वहाँ से JR यामानोते लाइन या तोएई सबवे पकड़कर शहर के प्रमुख स्टेशनों तक जा सकते हैं। अगर आपका सामान भारी है और ट्रेन बदलने की झंझट नहीं चाहिए, तो टैक्सी लेना बेहतर होगा।
- मोनोरेल: 15 मिनट, ¥500, हामामात्सुचो स्टेशन। आगे JR यामानोते लाइन/सबवे कनेक्शन।
- टैक्सी: ~30 मिनट, ~¥6,000; ज़्यादा सामान पर सुविधाजनक।
English
From Haneda Airport
The monorail is the easiest option. Enjoy views of Tokyo Bay on the 15‑minute ride to Hamamatsucho Station, where you can switch to the JR Yamanote Line or the Toei Subway for most city destinations. If you’re carrying heavy bags and want to avoid transfers, take a taxi instead.
- Monorail: 15 min, ¥500 to Hamamatsucho Station, then JR Yamanote Line or subway.
- Taxi: ~30 min, ~¥6,000; convenient with heavy luggage.
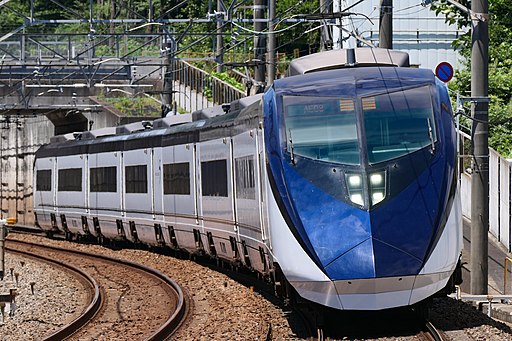
नरीता हवाई अड्डा (Narita Airport) से
शहर तक पहुँचने के तीन रास्ते हैं—हाई‑स्पीड बस, ट्रेन और टैक्सी। हाई‑स्पीड बस सबसे संतुलित विकल्प है: सीट पक्की मिलती है और किराया लगभग ¥1,000 से शुरू होता है। ट्रेनें तेज़ और समय का पालन करने वाली हैं, इसलिए हल्का सामान लेकर अकेले यात्रा करने वालों के लिए बढ़िया हैं, लेकिन बड़े परिवार के लिए कम सुविधाजनक लग सकती हैं। टैक्सी सबसे महँगी होती है, पर सीधे गंतव्य तक छोड़ती है और तीन‑चार लोगों के साथ किराया बाँटने पर किफ़ायती भी हो सकती है।

Source: Wikimedia
Source: Wikimedia
Source: wikimedia
हाई‑स्पीड बस (सस्ता व आसान)
- हर लगभग 20 मिनट पर “Tokyo Shuttle” / “Access Narita”
- टोक्यो स्टेशन, शिंजुकु, इकेबुकुरो तक ~80 मिनट
- किराया: लगभग ¥1,300
- टिकट: आगमन गेट से बाहर बाएँ काउंटर (बस स्टॉप ठीक पीछे)
ट्रेन: Narita Express (N’EX)
- टोक्यो, शिंजुकु, शिबुया, इकेबुकुरो तक ~60 मिनट (बिना बदलाव)
- किराया: लगभग ¥3,000
- टिकट: JR काउंटर
ट्रेन: स्काईलाइनर
- सबसे तेज़: निप्पोरी ~36 मिनट, ऊएनो ~40 मिनट
- किराया: लगभग ¥2,570 (आरक्षित सीट)
- टिकट: केइसेई काउंटर या आगमन हॉल की मशीनों से
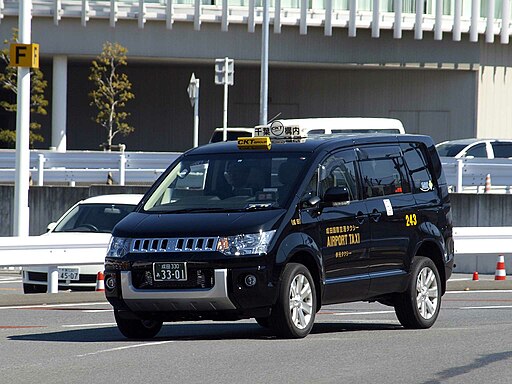
टैक्सी
- लगभग 90 मिनट, किराया ~¥20,000
- भारी सामान होने पर सुविधाजनक, लेकिन सबसे महँगा विकल्प
ध्यान रखें
- किराये मार्च 2024 के आसपास के अनुमान हैं; समय और परिस्थितियों से बदल सकते हैं।
- रात 23:00 से सुबह 5:00 तक कई सेवाओं में अतिरिक्त शुल्क लगता है या अंतिम बस/ट्रेन का समय जल्दी होता है—पहले से जाँच लें।
- वास्तव में तो हम आपको लेने ही आएँगे, इसलिए चिंता करने की ज़रूरत नहीं है।
English
From Narita Airport
To reach the city you can choose a highway bus, a train, or a taxi. The highway bus is the most balanced option: seats are guaranteed and fares start at about ¥1,000. Trains are faster and always on time, making them ideal for solo travellers with light luggage, though they’re less convenient for large families. Taxis cost the most but take you straight to your destination and can be economical if three or more people share the fare.
Highway Bus (cheap & easy)
- Runs roughly every 20 min – “Tokyo Shuttle” / “Access Narita”
- About 80 min to Tokyo Station, Shinjuku, Ikebukuro
- Fare: ~¥1,300
- Buy tickets at the counter to the left of arrivals (bus stop is just behind)
Narita Express (N’EX)
- About 60 min to Tokyo, Shinjuku, Shibuya, Ikebukuro (no transfers)
- Fare: ~¥3,000
- Tickets at JR counters
Skyliner
- Fastest rail option: 36 min to Nippori, 40 min to Ueno
- Fare: ~¥2,570 (reserved seat)
- Tickets at Keisei counter or ticket machines in arrivals hall
Taxi
- About 90 min, ~¥20,000
- Most convenient if you have lots of luggage, but the priciest
एयरपोर्ट से होटल तक का पूरा क्रम यहीं समाप्त होता है। पहली विदेश यात्रा होने के कारण थोड़ा तनाव महसूस हो सकता है, लेकिन एयरपोर्ट‑स्टाफ मददगार हैं, और हम भी आपको लेने आएँगे—इसलिए निश्चिंत रहें। पहुँचते ही सबसे पहले आराम कीजिए; अगले दिन से आपकी जापान‑यात्रा का असली आनंद शुरू होगा।
English
That’s the whole journey from landing to your hotel. A first overseas trip can feel nerve‑racking, but airport staff are friendly and we’ll be there to meet you, so relax. Once you arrive, take a good rest—the fun of exploring Japan begins the very next day!